


Beginner's Guide to Candle Making
The practice of making candles dates back for centuries. In medieval times, it was known as chandlery, and it was crucial during times when there were no other options for lighting. Candles were then primarily made of tallow and wax. Today, candles are no longer a necessity, but they continue to add a delightful ambience in any room. While many people enjoy burning candles for their warm glow or for their scent, some people take their love of candles a step further, learning to make their own candles in order to save money and be able to customize their candles however they want. Homemade candles can burn and smell just like store-bought ones, they're not difficult to make, and they also make great gifts.
Supplies
Wax
Most wax is available in pellet form, so it's easy to melt. Wax might also come in blocks, which you would need to cut into smaller chunks to melt. You have your choice of three different types of wax for candle-making: paraffin, soy, and beeswax. Paraffin is the traditional type of wax, used for hundreds of years and still popular today. Paraffin is inexpensive, and it's easy to add a variety of colors and scents to it. Some people prefer not to use paraffin due to the fact that it's a petroleum byproduct. One popular alternative is soy, which is made out of soybean oil, although it might also be blended with other types of waxes such as paraffin. Soy is easy to color and scent with additional ingredients. Beeswax is an ancient candle-making ingredient that comes from bees. Beeswax has a natural gold color, and it has a lightly sweet scent. Beeswax does not accept scents readily, and it is the most expensive wax option.
- Early Candle Materials
- Paraffin Wax
- Soy Candles vs. Paraffin Candles
- Obtaining, Preparing, and Using Beeswax
Wicks
Wicks come in a range of sizes. The length of a wick is not crucial, and you can always trim a wick to make it the correct length. Wicks generally come in small, medium, and large widths. For best results, choose a larger wick for most candles.
- Are There Multiple Types of Candle Wicks?
- Container Candle Instructions
- Beware of the Dangers of Lead Wicks
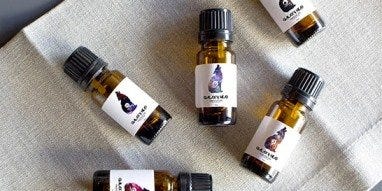
Fragrance Oils
Adding scents to candles helps make them a delightful addition to any room. With many scents available, you can create candles with fragrance blends of your own devising. Some people use essential oils to add aromas to candles, but the finished product may be inferior, as it can be tricky to avoid overheating the oils while making the candle. Instead, special fragrances made for candles should be added to your wax to make candles with scents you enjoy.
Double Boiler
When making candles, you may wish to invest in a double boiler for melting the wax. Generally, placing wax directly into a pot and placing the pot over the heat source is not advised because the direct heat will often be too hot for the wax. Melting wax in a double boiler is ideal because it's a gentler heat source.
- Double Boilers: What Are They, and How Are They Used?
- What Is a Double Boiler?
- Container Candle Instructions (PDF)
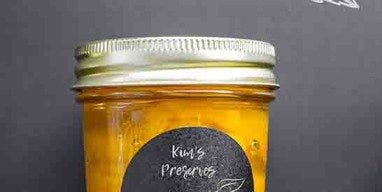
Containers
Consider the type of heat-resistant container you want to use for your candles. Candle jars are a popular option, and they come in many different sizes. Some people also like to pour candles in coffee mugs, Mason jars, or tins.
How to Make Your Own Candle
- Prepare the Work Area: Candle-making can be messy, so set aside a work area where you'll have plenty of room without worrying about splattering wax. Cover your work area with newspaper or an old tablecloth. Set out your supplies, including jars, wicks, a spatula, a thermometer, and a double boiler. If you spill wax, you should be able to clean it off after it dries.
- Melt the Wax: Melt the wax about a half-pound at a time in the double boiler. Monitor the melting, stirring occasionally with the spatula. Melting the wax will take between 10 and 15 minutes, and you should try to get the wax temperature to between 160 and 170 degrees Fahrenheit.
- Adhere the Wick: Affix the wick to the container. You might wish to glue it, or the wick might have a sticker on the bottom of it. You can also place a small drop of melted wax on the bottom of the wick, then press it into the bottom of your container. The hardened wax will affix the wick.
- Add Fragrance: After melting the wax, add the fragrance oils in the recommended amount for the amount of wax you've melted. A general rule of thumb is one ounce of fragrance oil for one pound of wax. Pour the fragrance oil into the melted wax and stir it for about 30 seconds.
- Cool and Pour: Let the wax cool for several minutes, until the temperature falls to between 130 and 140 degrees Fahrenheit. Pour the cooled wax into your container, holding the wick gently so it doesn't move. Leave some melted wax to add to the container after the initial pour settles. If a depression appears in the center after the wax cools for a couple of hours, pour additional wax to fill it.
- Secure and Trim Wick: Keep the wick centered while the wax hardens. You might want to wrap excess wick around a pencil, laying the pencil across the top of the jar to hold the wick in place. Once the wax hardens, you can trim the wick back to about a quarter of an inch above the wax.
Resources
- Making Candles at Home (PDF)
- Making Candles With Beeswax (PDF)
- The Art of Candle-Making (PDF)
- Candle Safety Requirements and Recommendations (PDF)
- How to Make a Soy Candle
- Beginner's Guide to Candle Wax
- Candle Science
- How to Make a Candle Using Animal Fat and Cotton String
- How to Make Beeswax Candles
- How to Make Your Own Scented Candles on a Budget
- How to Make Gel Candles


